Use Apache Kafka SASL OAUTHBEARER With Python
Learn how to use the Confluent Python client with SASL/OAUTHBEARER security protocol to produce and consume messages to topics in Apache Kafka.
Join the DZone community and get the full member experience.
Join For FreeThis post will teach you how to use the Confluent Python client with Simple Authentication and Security Layer Mechanisms (SASL)/OAUTHBEARER security protocol to produce and consume messages to topics in Apache Kafka and use the service registry to manage the JSON schema.
SASL/Oauthbearer is more secure than SASL/PLAIN where the username/password is configured in the client application. In case user credentials are leaked, the blast radius would be more significant as the user might have other access. In SASL/OAUTHBEARER, service accounts are preferred, which reduces the blast radius on leakage. It is recommended to have one service account per client application. With service accounts, resetting credentials can be quickly compared to user credentials.
You can also use service accounts in SASL/PLAIN over OAuth, which solves the secret rotation problem. In Figure 1, you can see both flows. At first, it takes 4 round trips to make a connection, whereas in OAuth over SASL, the client makes a token request to the authorization server and sends the token to the Kafka broker/resource server, which is efficient and reduces the blast radius with fewer hops. For better understanding of thread model and risk, refer to OAuth 2.0 Threat Model and Security Considerations.
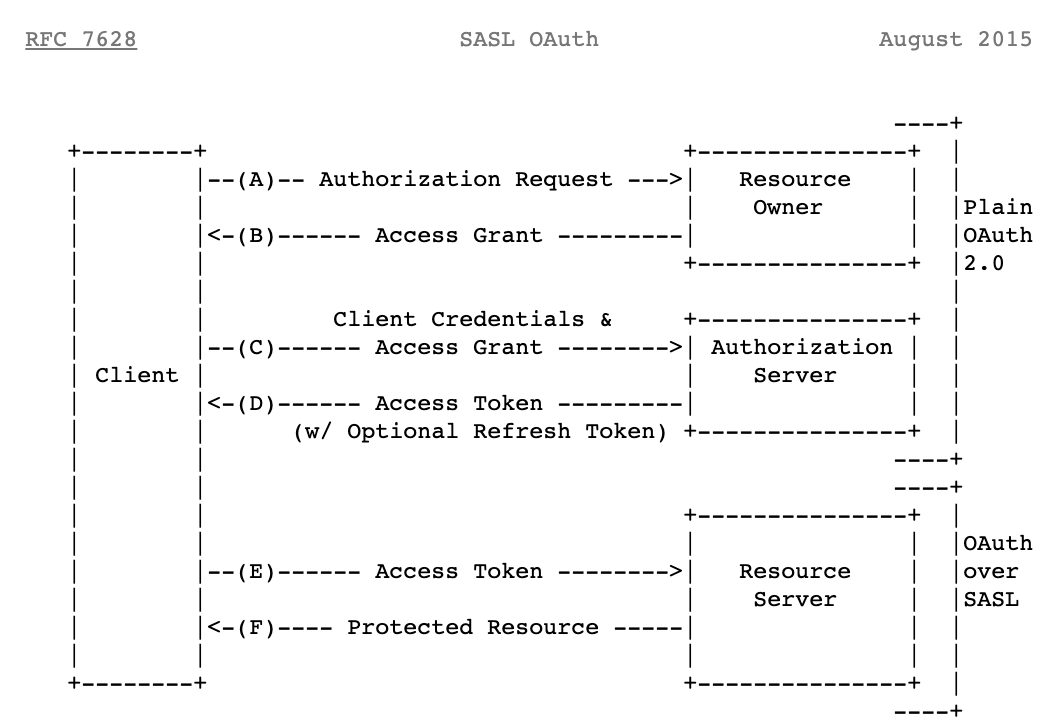
Figure 1: SASL Plain & SASL Bearer flow
Architecture Overview
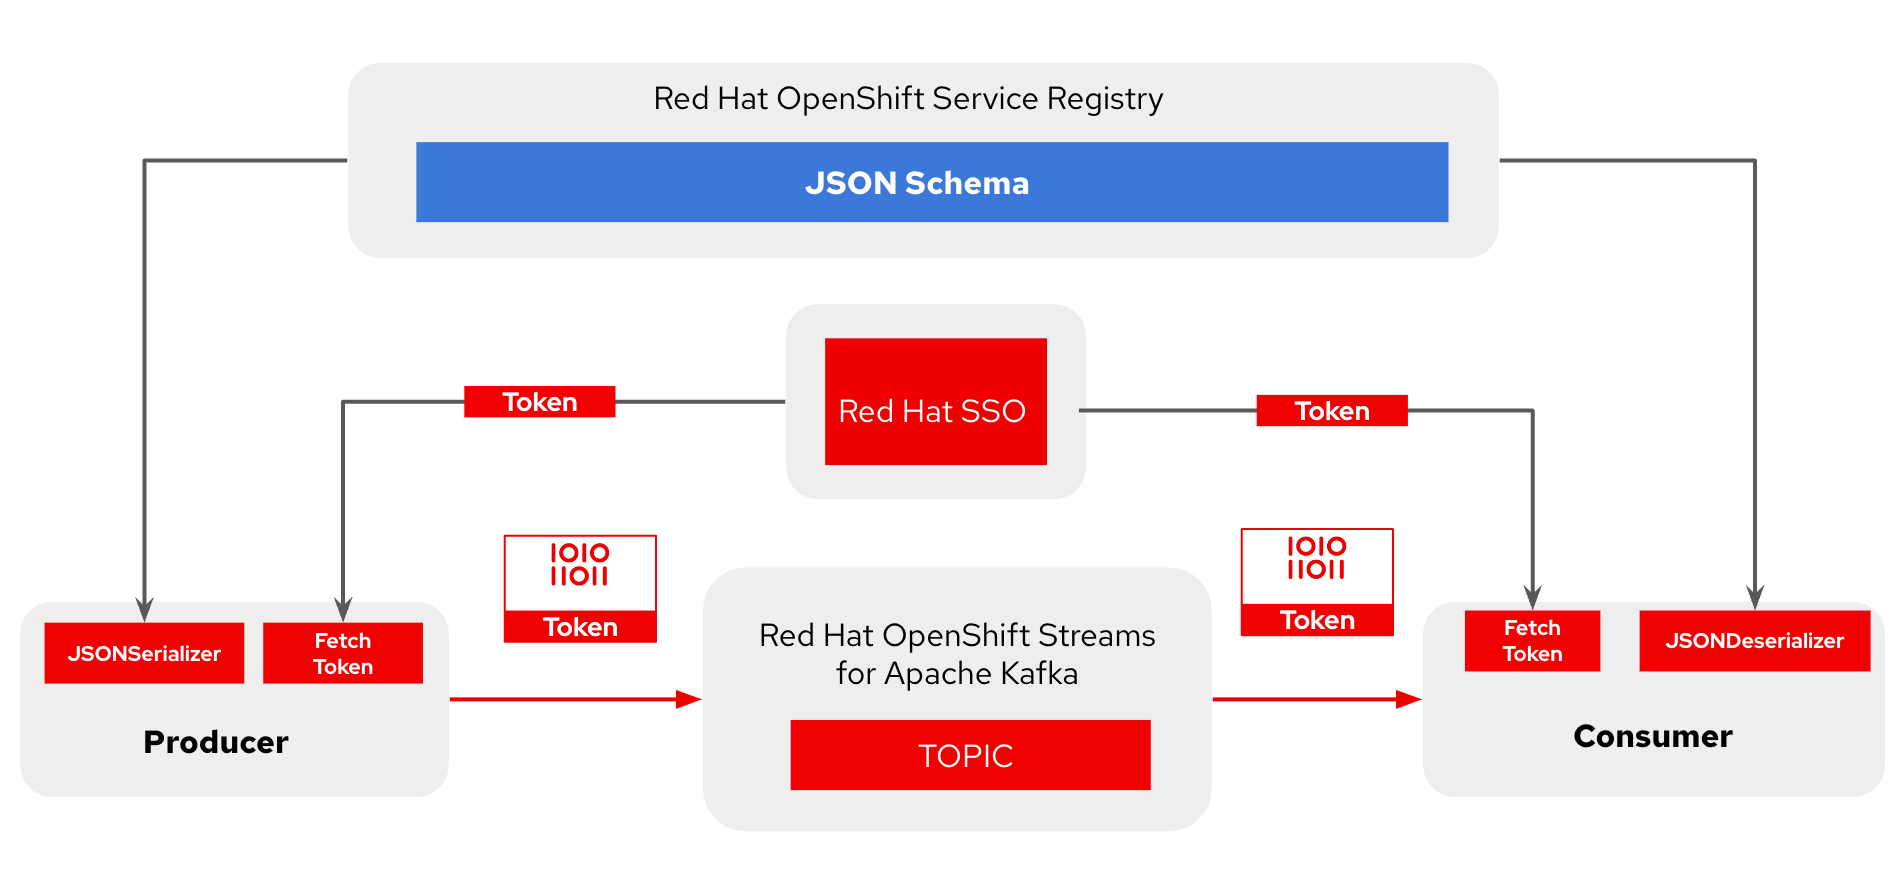
In Figure 2, I am using two Python clients: producer producer_oauth.py and consumer consumer_oauth.py. For Apache Kafka and service registry, Red Hat OpenShift Streams for Apache Kafka and Red Hat OpenShift Service Registry allow the creation of ready-to-use developer instances and supports the security mechanism out-of-the-box SASL/OAUTHBEARER and SASL/PLAIN over OAuth and easily configuration management.
Figure 2: Using Python client producer/consumer to publish a message to a topic in Apache Kafka and using service registry for serializing/deserializing messages.
Let's go over the setup in detail involved in creating an Apache Kafka instance, a service registry instance, service accounts and topics in Kafka, granting permissions to the service account, and finally, configuring the Python clients.
Setup
Visit the code repository for Using Confluent Kafka Python client with SASL/OAuth.
Apache Kafka and Service Registry
Create a Kafka instance and login into the RedHat Hybrid Cloud Console. Select "Stream for Apache Kafka" under the Application and Data Services catalog. Click on "Kafka Instances." In Figure 3, you can see I already created an instance with the name kafka-instance. You can use any allowed name.

Figure 3: Create Kafka Instance
Once the status appears in a ready state, click on the kebab icon (three vertical dots) to view the connection details, as shown in Figure 3.
Copy the Bootstrap Server URL and create an export for it or copy it for later use, which can be used for running the producer/consumer client.
```export bootstrap_url= ```Now, click on the "Create service account" button to create a service client id and secret. Use the service account clientId and secret. You can retrieve an access token by making a client credential grant request to the authorization server, which is Red Hat SSO, in this case.
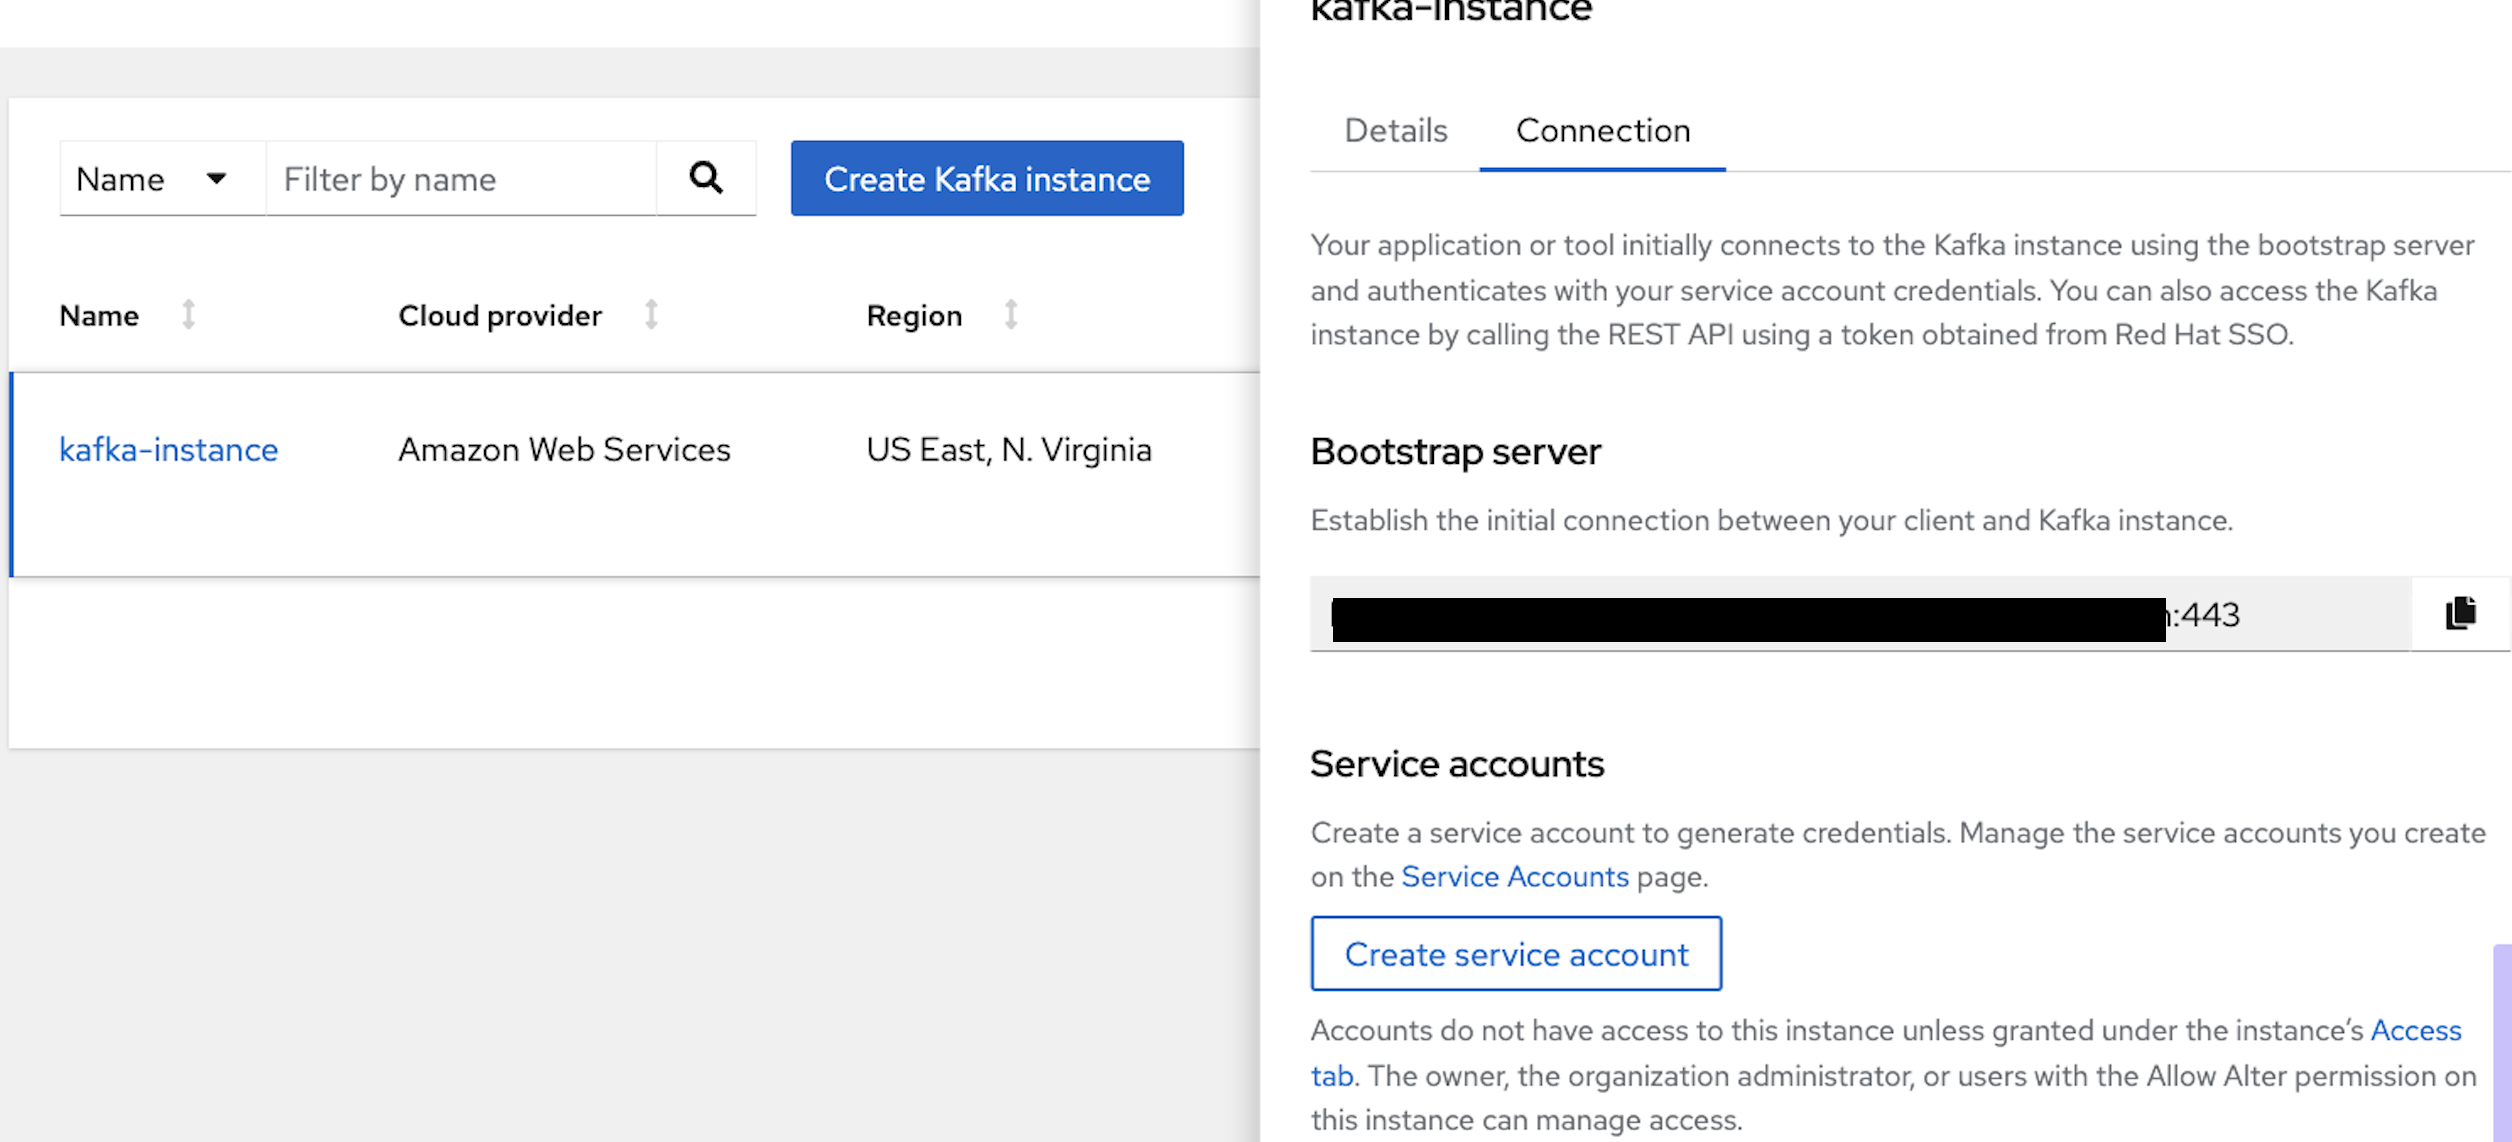
Create a service account and copy the credentials.
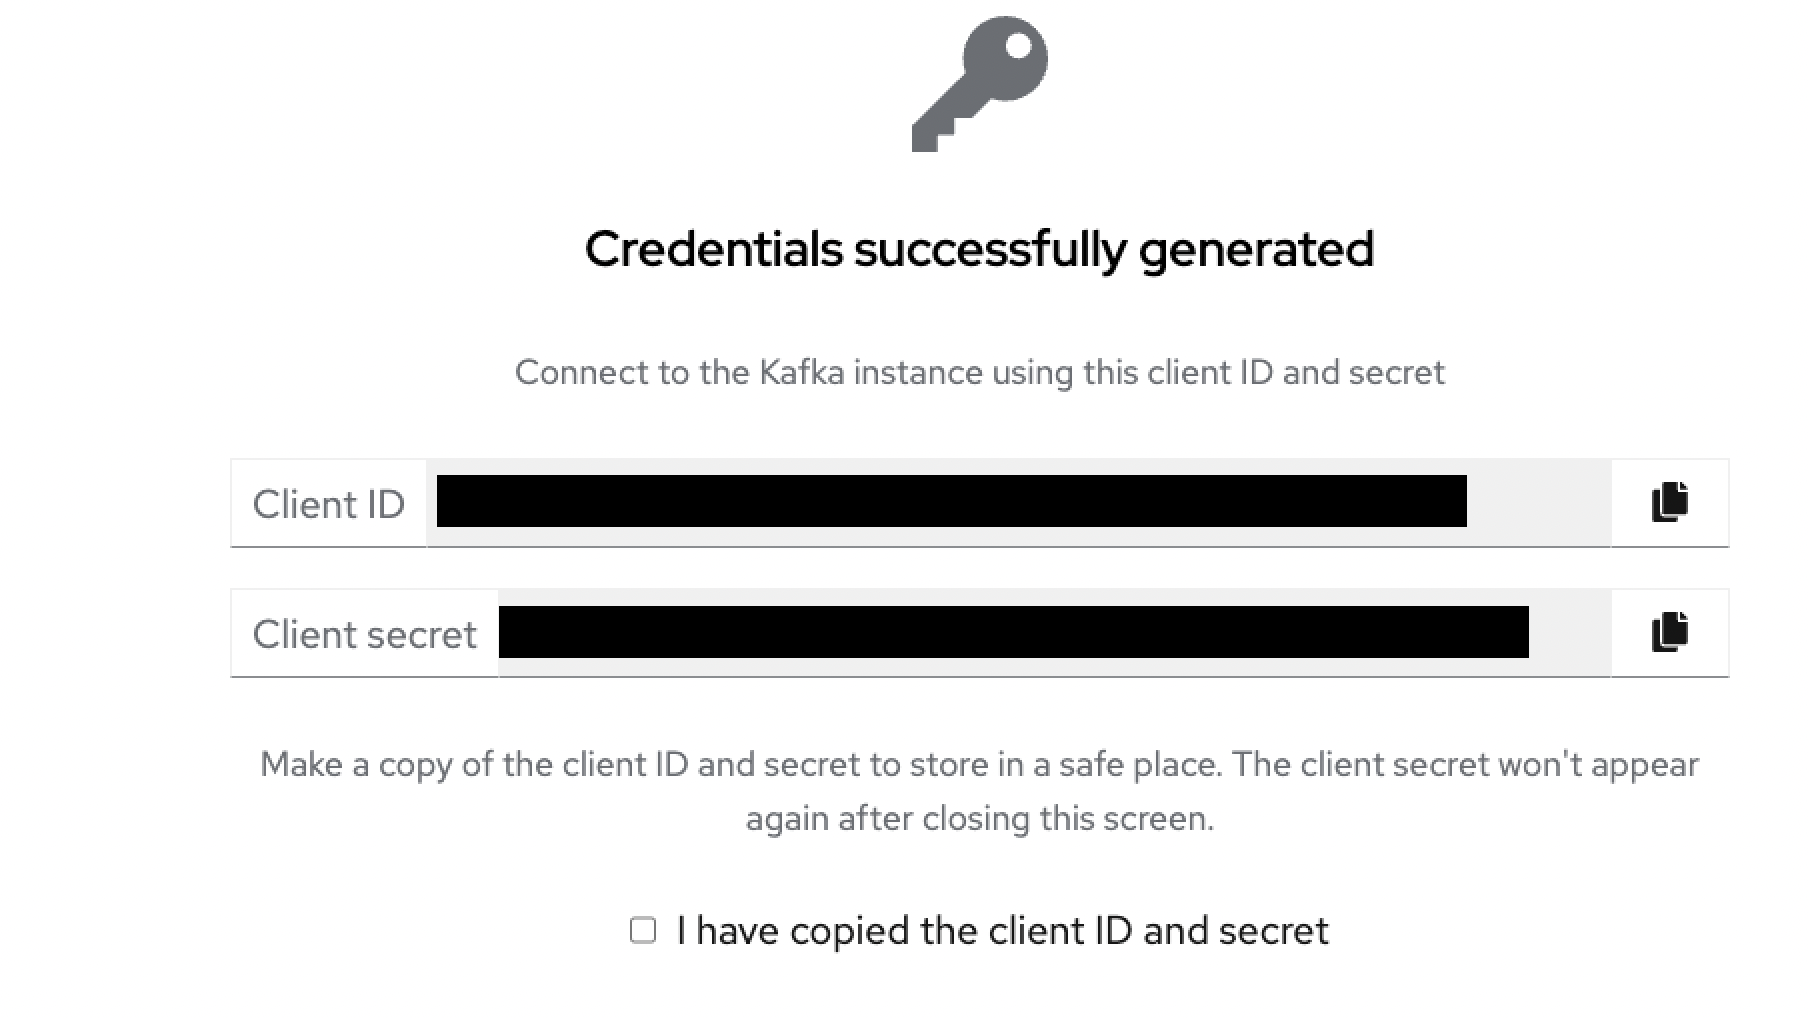
Figure 5: Service account generated
```export service_account_client_id=```

```export service_account_secret=```
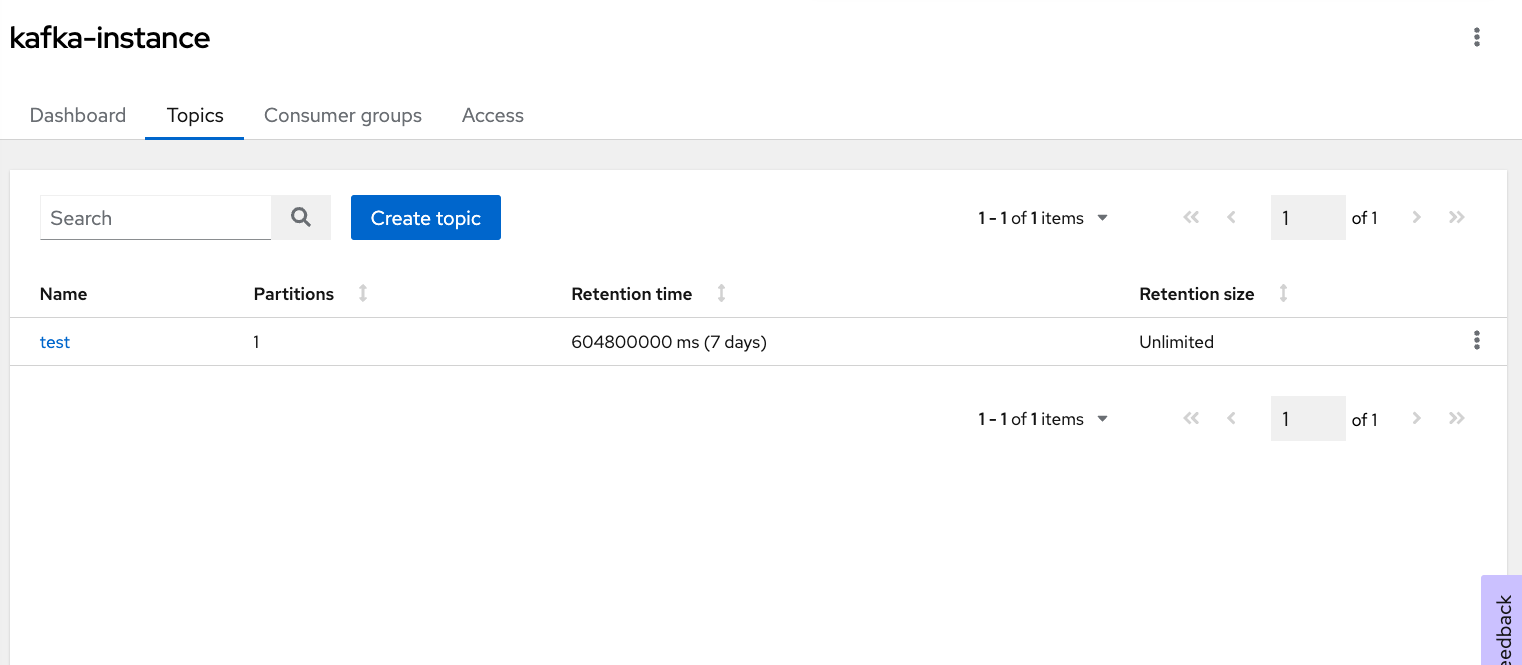
Navigate to the Kafka Instances section, and click on the instance you have created. Let's create a topic. In Figure 6, I have created a topic with the name "test." You can pick any preferred name.
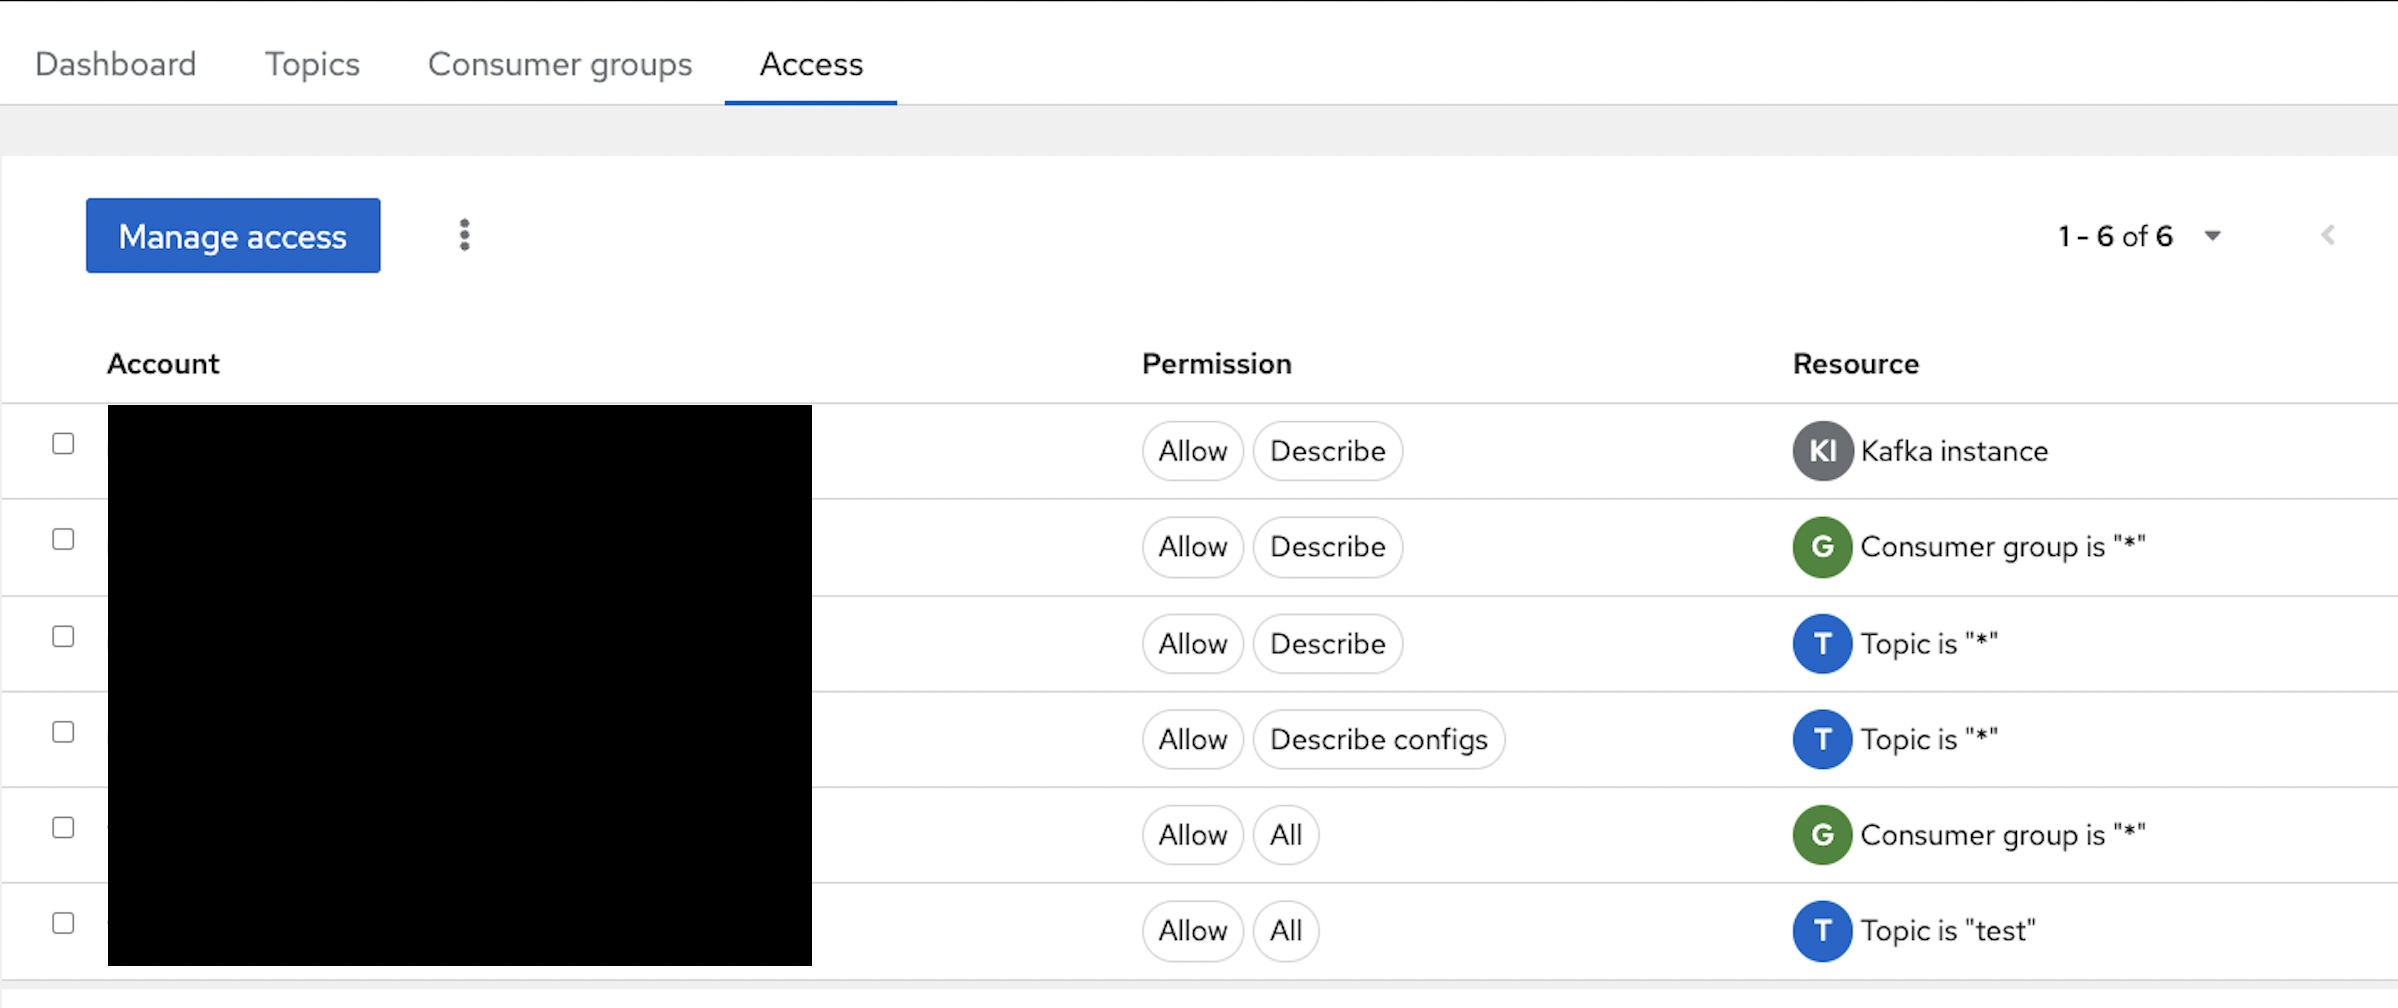
Assign access to the service account created in the above section. In Figure 7, I have assigned access to the topic "test" and added permission for the Consumer group. For simplicity, I have assigned wildcard (*) permission; but you can assign fine-grained permissions.
Let's create a service registry by navigating to "Service Registry" in the Application and Data Services catalog. In Figure 8, I have created a "test-registry" instance.

In Figures 9 and 10 as shown, upload the schema.json to service registry.
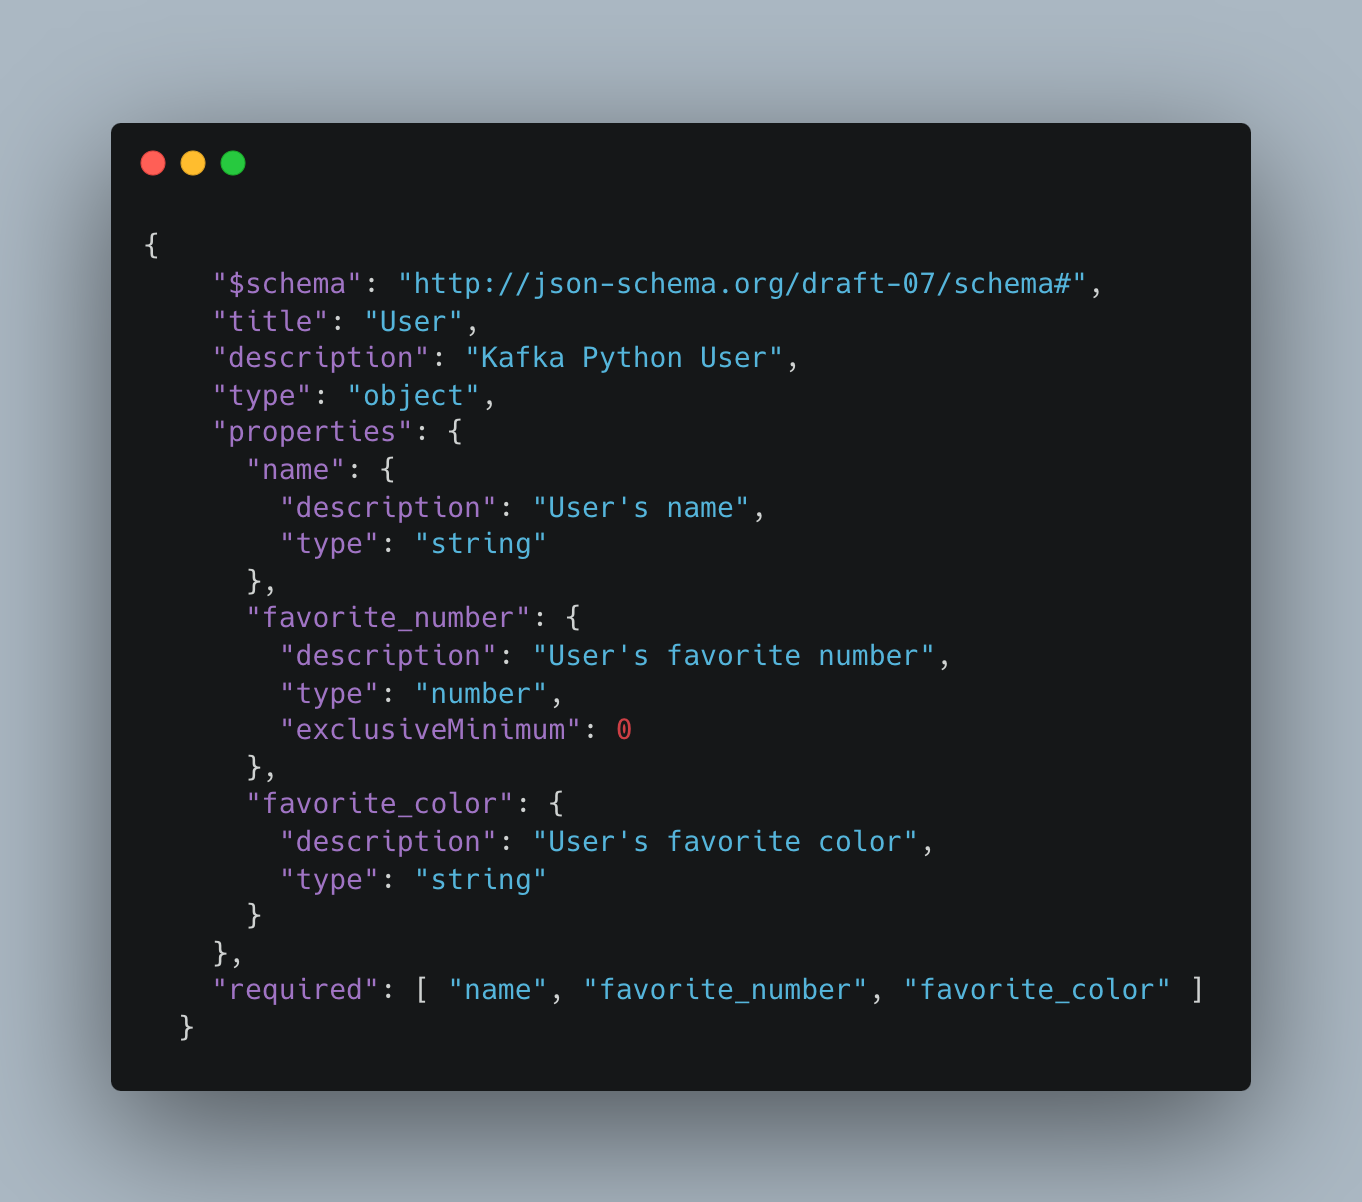
Figure 9: User Schema
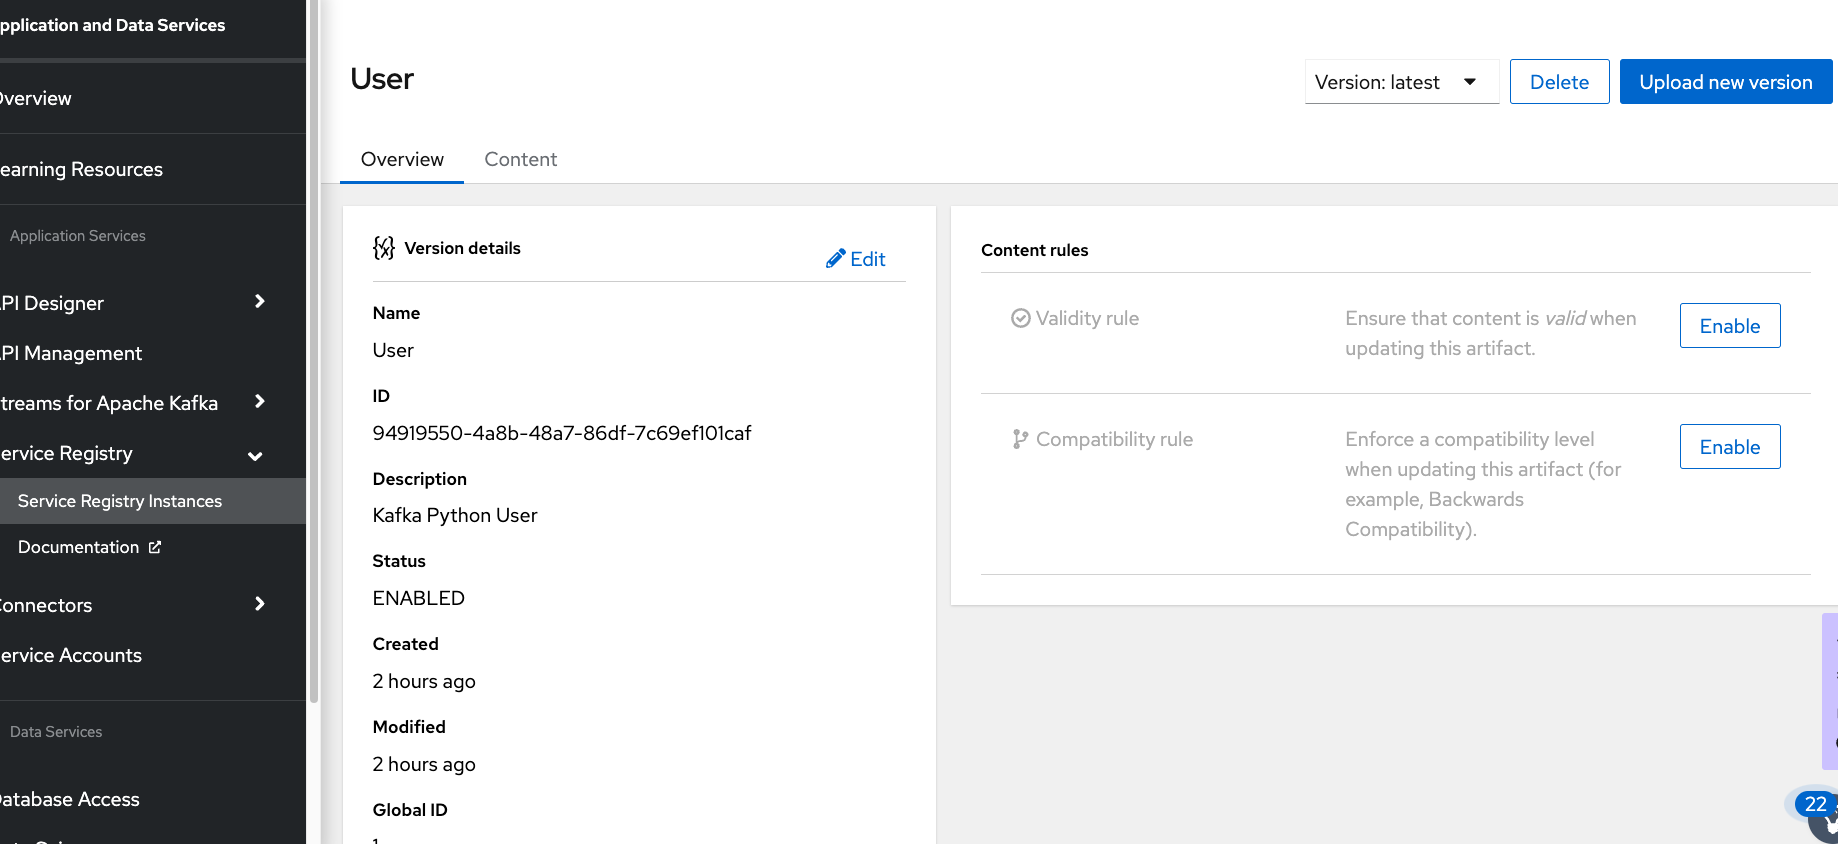
Figure 10: Upload the Schema to Service Registry
For the Confluence Python client, copy the "Schema Registry compatibility API" as shown in Figure 11. This API URL can be used by the schema registry client to access the schema when performing serialization/deserialization.

```export registryschema=```Assign service account permission to access this schema registry. As shown in Figure 12, navigate to the Access dashboard, and click on the "Grant access" button.
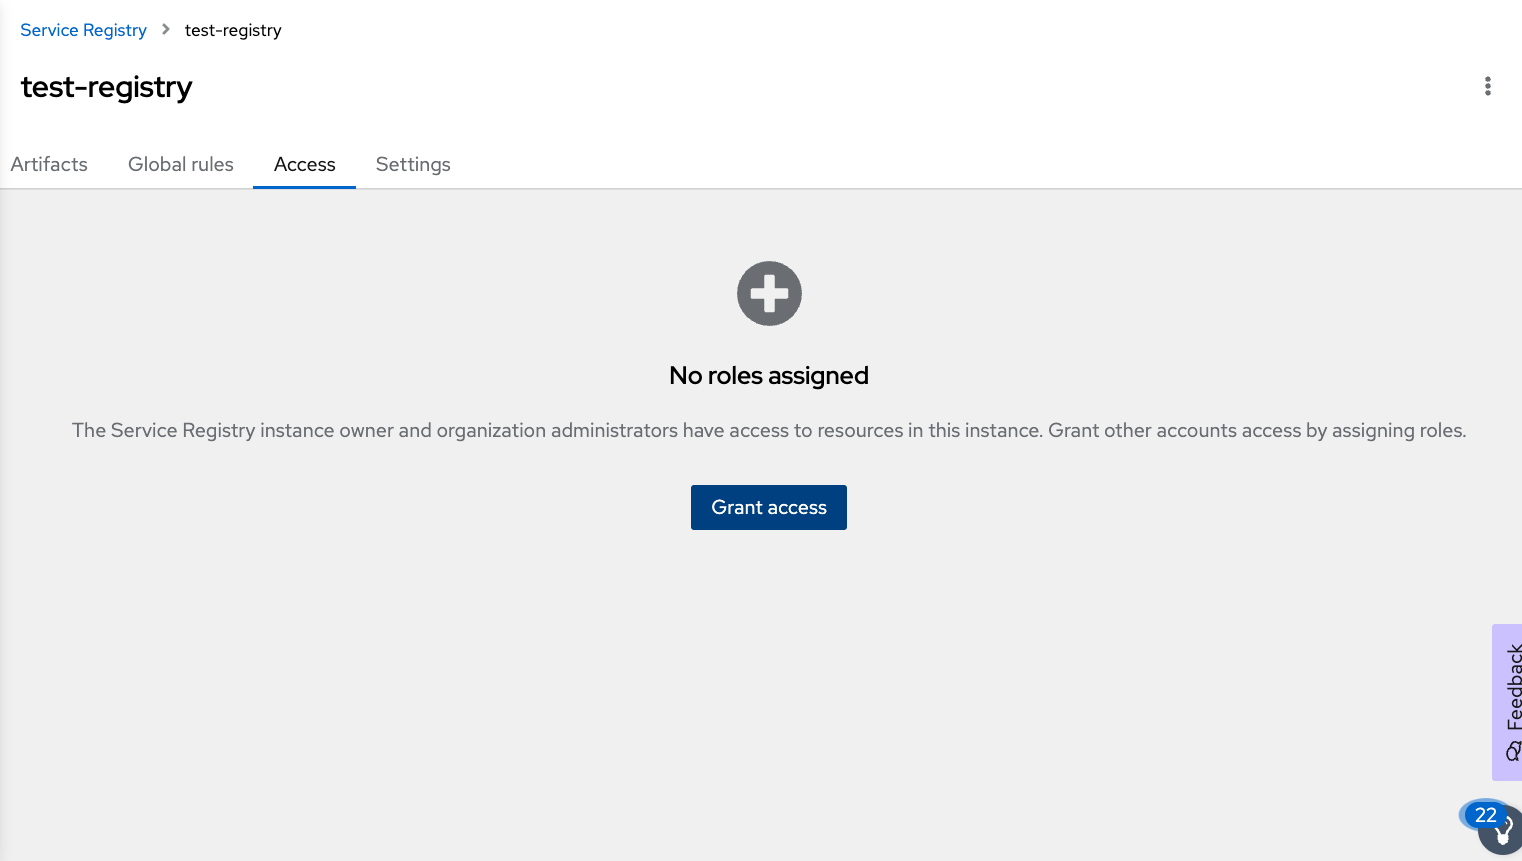
Figure 12: Assign role to the service account
Select the service account from the account drop-down section and assign it as "Viewer" or "Manager" based on the use case shown in Figure 13.
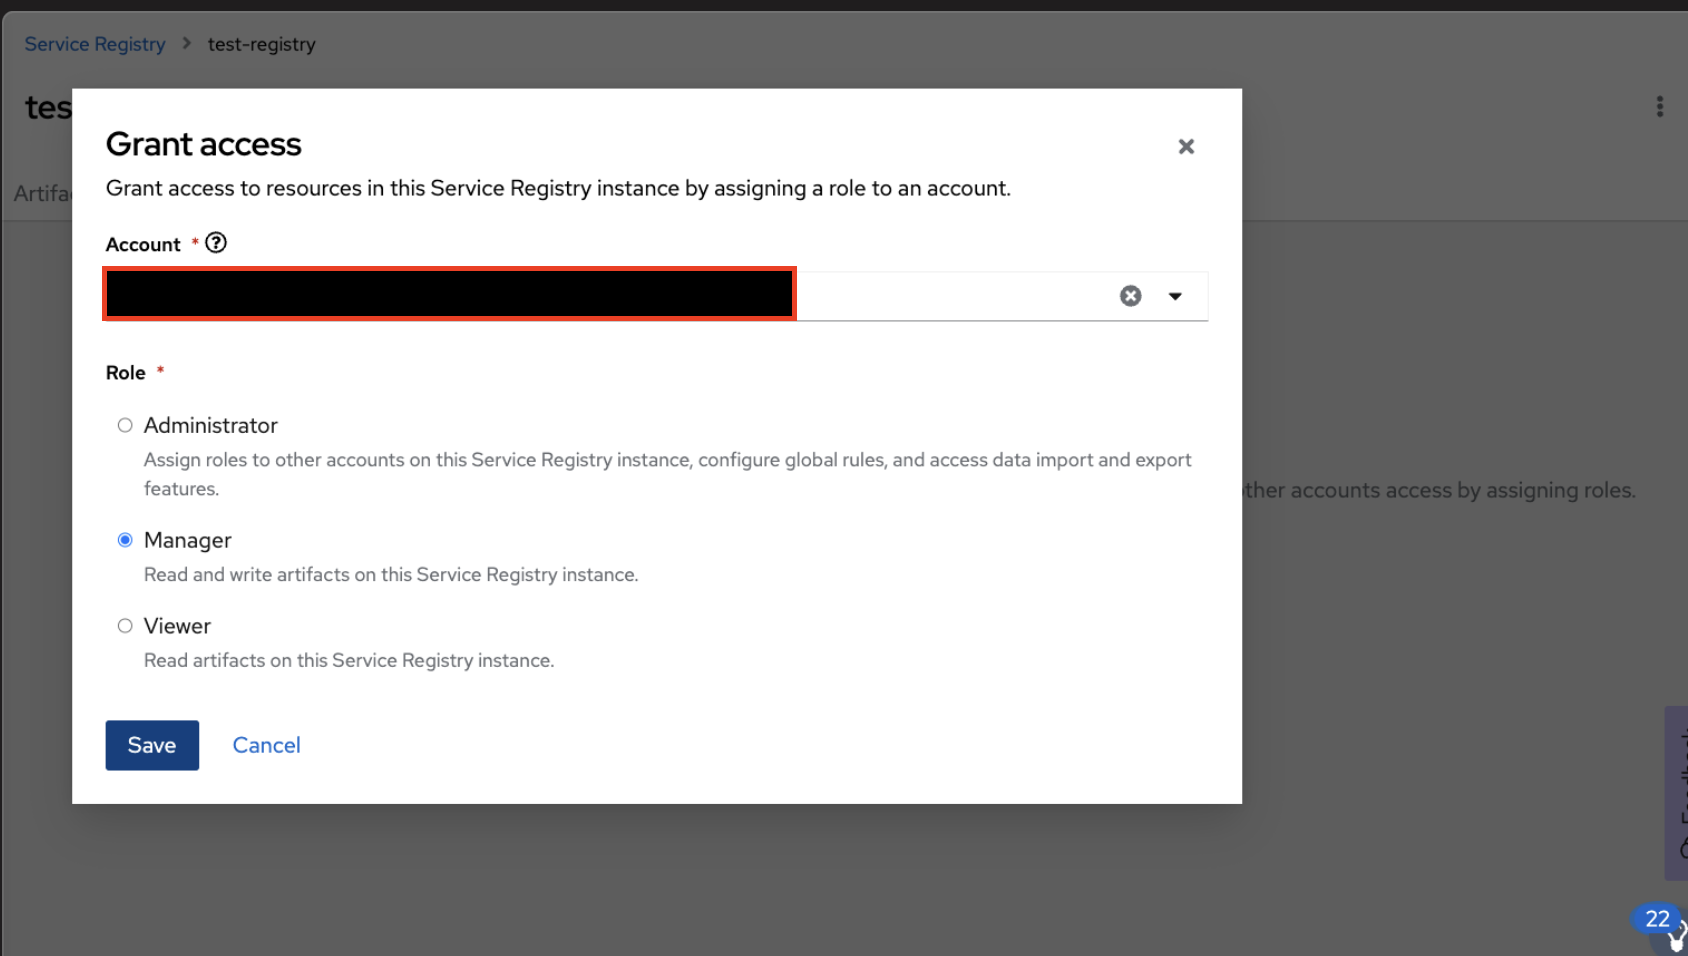
In the above section, we have created a Kafka instance, a topic, and a service account, as well as added permission for the service account to access the topic and consumer group. We created a service registry and uploaded the schema JSON and granted a role to service accounts for accessing the schema. For simplicity, I am using the same service account and assign privileges, but you can use it separately for each purpose.
Python Producer and Consumer
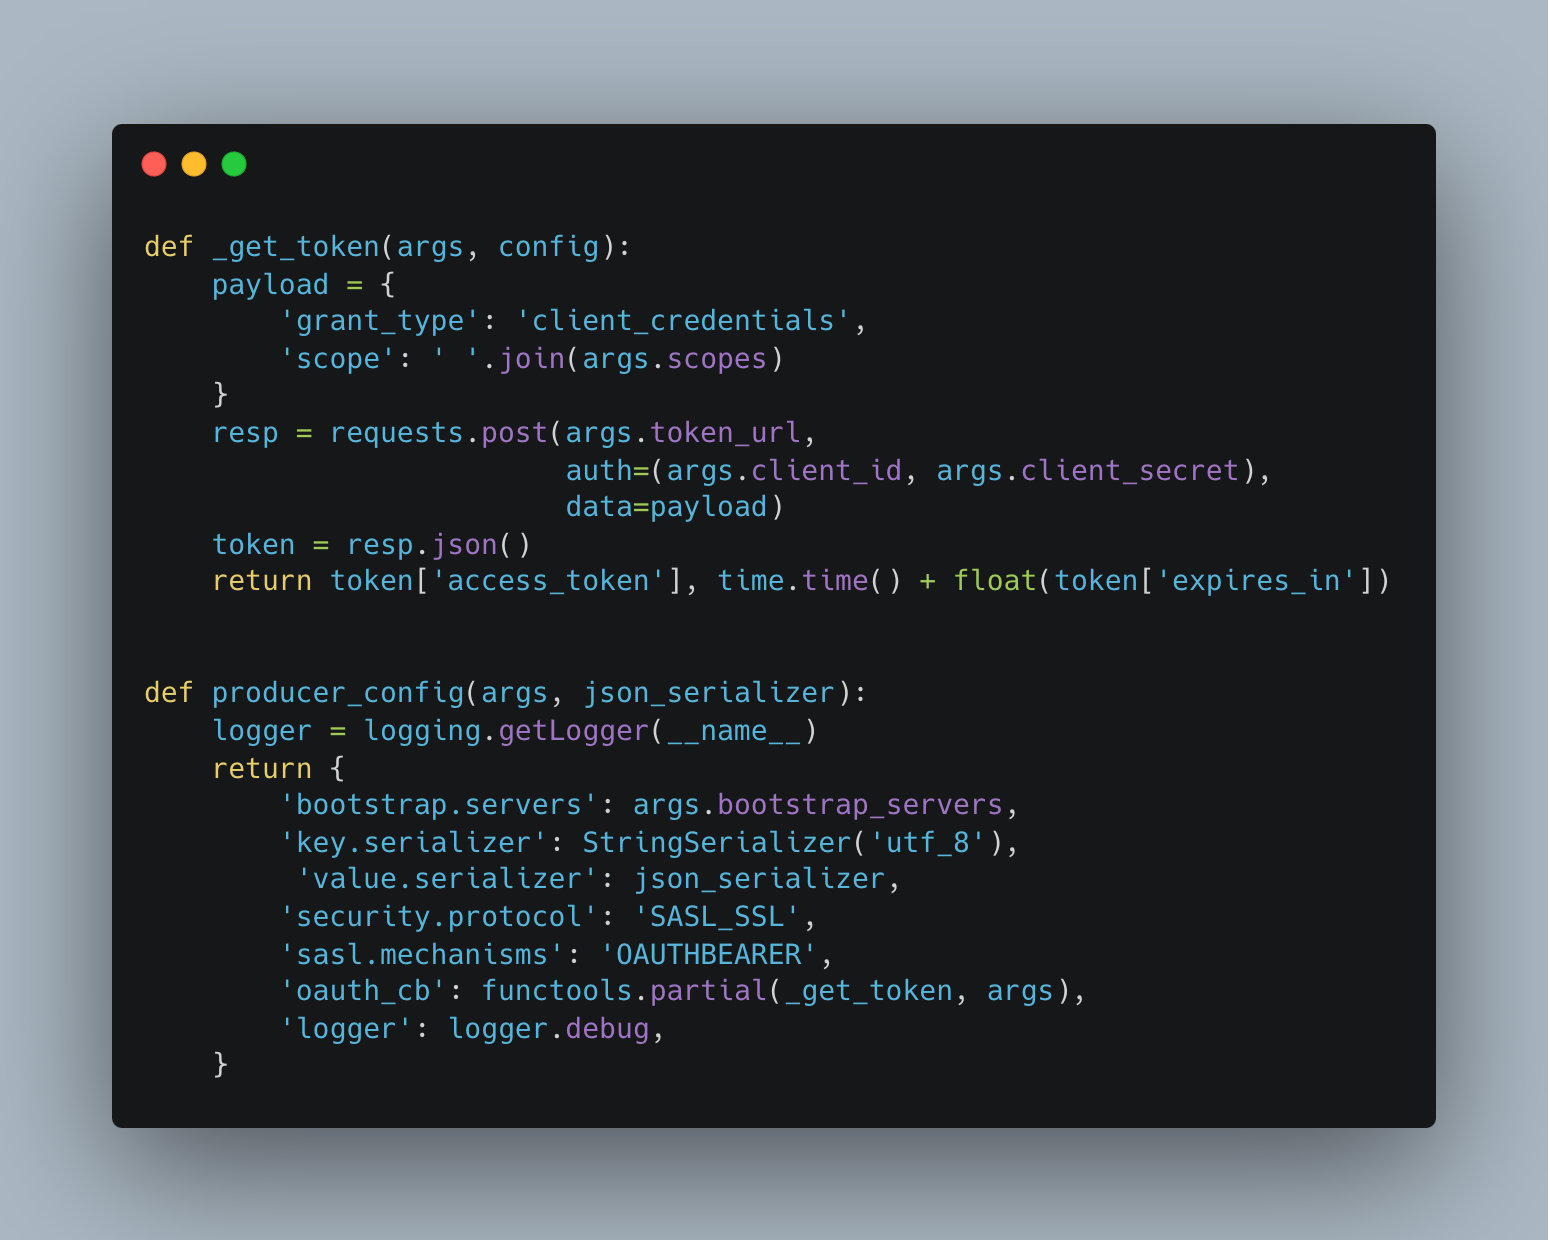
In Figure 14, you can see the configuration requirements for the Python producer client for using "SASL/OAUTHBEARER" with the service account passed as client_id, client_secrets, and authorization server token URL via command line arguments.
When a client tries to establish the connection, the get_token method will make a client credentials grant request to the authorization server with client_id, client_secrets and authorization server token URL. In this case, the authorization server is Red Hat SSO. On a successful request, return an access token, which can be sent with a produce messages request to the Kafka Broker.
The schema registry will be used for the serialization of the message, which can be fetched from the service registry using the service account as a basic authentication mechanism. SchemaRegistryClient requires the "Schema Registry compatibility API" and service account, as shown in Figure 15.

Figure 15: Schema Registry Client
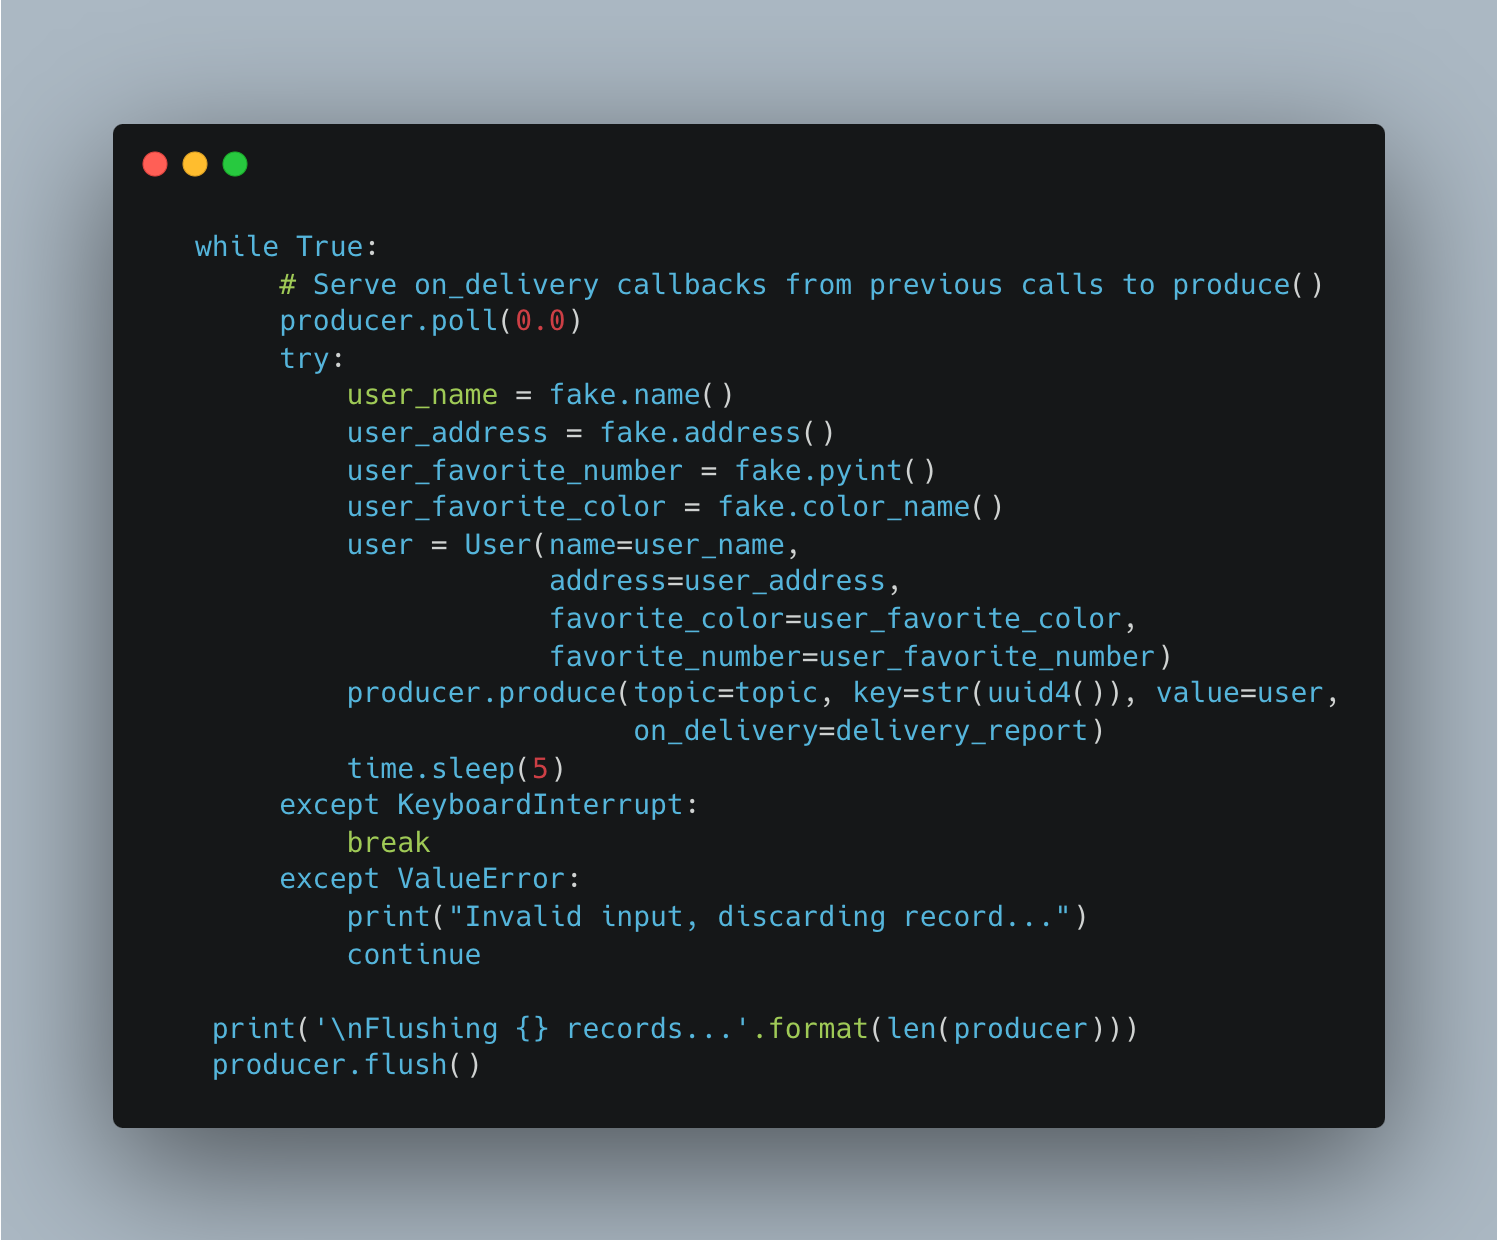
A simple producer publishes random user data like user name, address, favorite color, etc. to a topic provider as input argument, as shown in Figure 16.
Python consumer client follows a similar configuration for the SASL/OAUTHBEARER protocol, as shown in Figure 17.
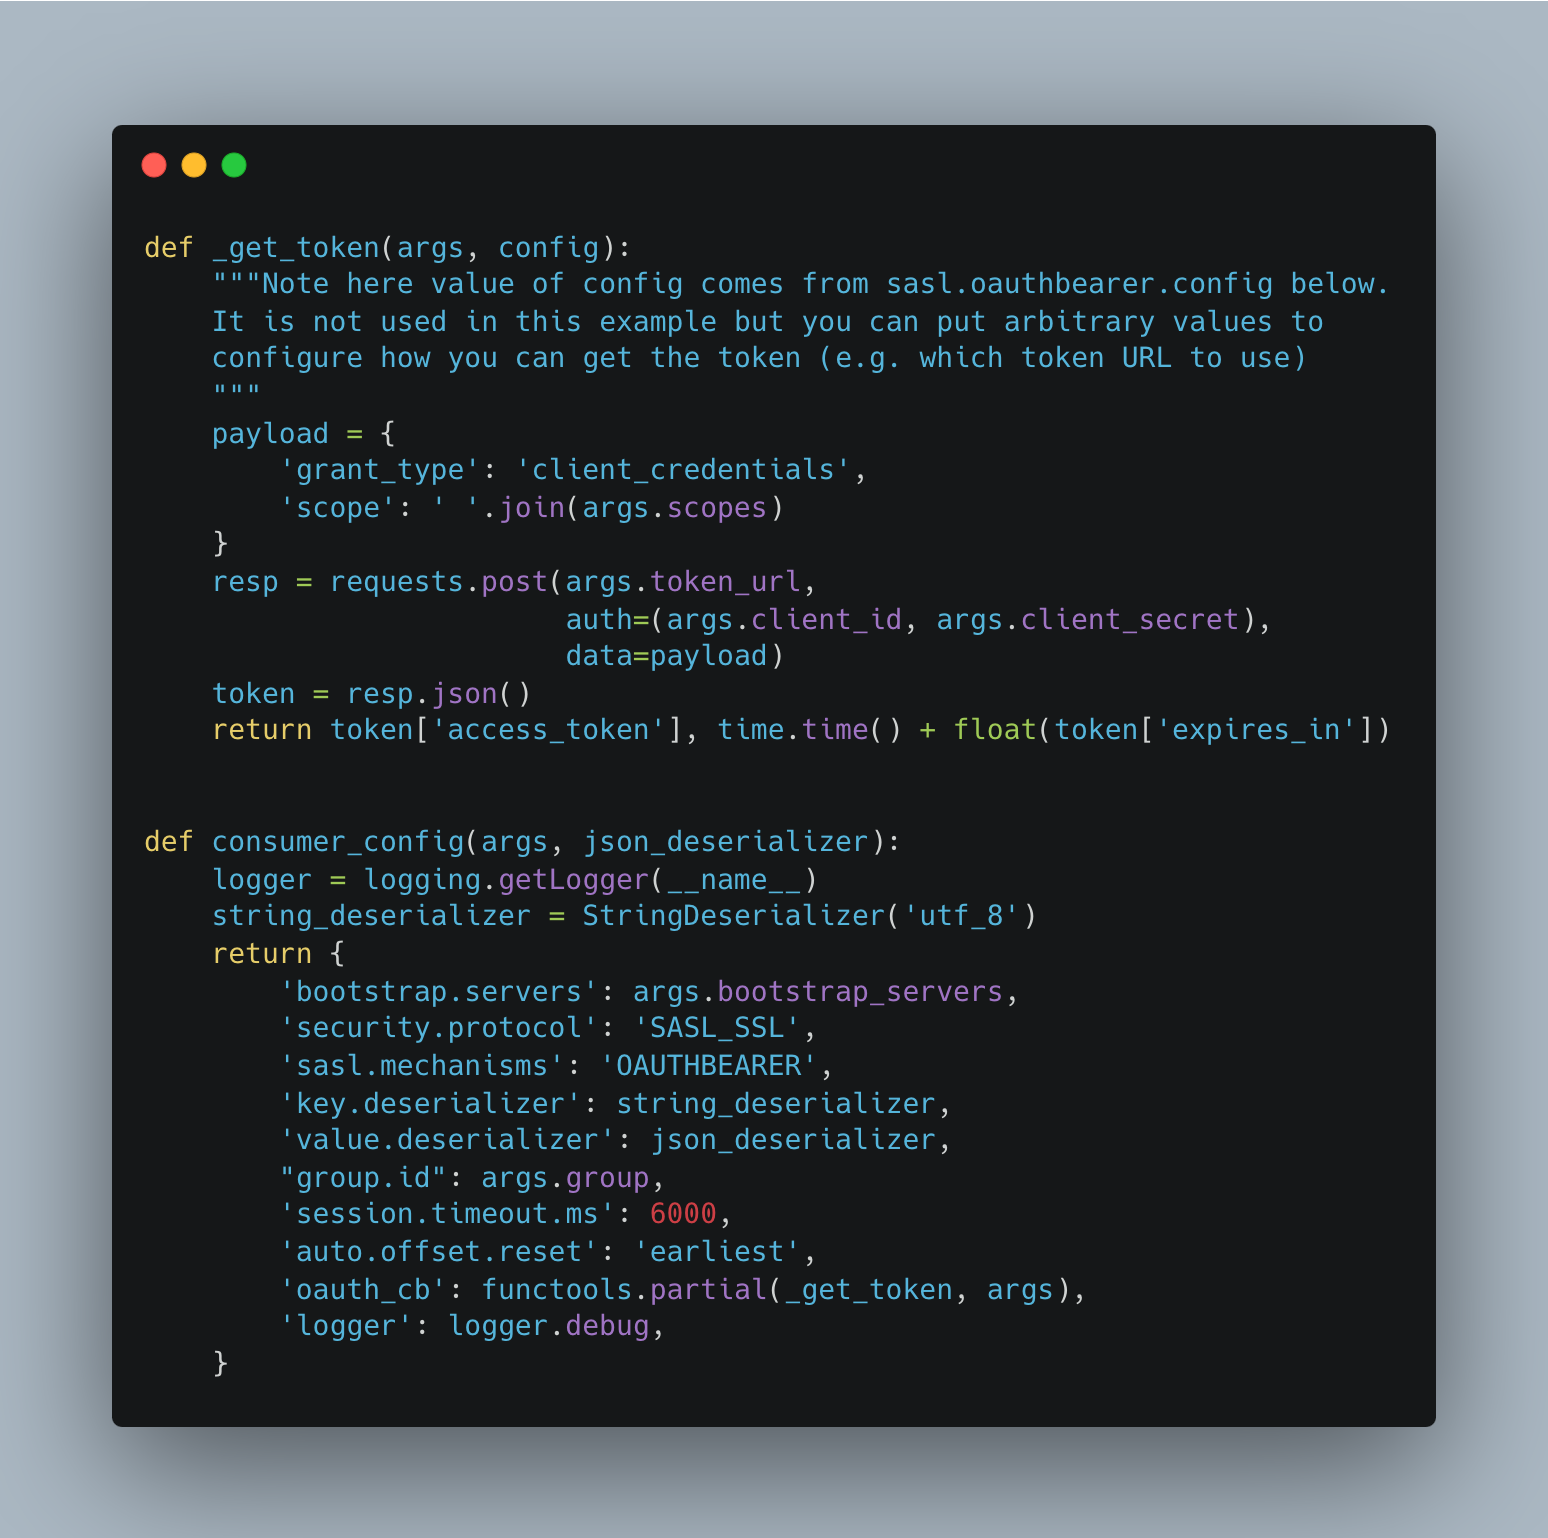
Figure 17: Consumer configuration
Let’s Try the Producer/Consumer in Action
Please clone the repository python-kafka-sasl-oauth as linked earlier in this tutorial under the "Setup" header, and navigate to the folder directory "python-kafka-sasl-oauth" in your preferred shell. You can follow the instructions in the README configuring the Python dependencies.
Export service_account_client_id and secret:
```export service_account_client_id=```

```export service_account_secret=`
Export bootsrap_url, topic, schema registry, and token_url, etc.:
```export bootstrap_url= ```

```export token_url=https://sso.redhat.com/auth/realms/redhat-external/protocol/openid-connect/token```

```export topic=```

Use Schema Registry compatibility API

```export registryschema=```
Run the producer:
python producer_oauth.py -b $bootstrap_url --token-url $token_url --client $service_account_client_id --secret $service_account_secret --scopes api.iam.service_accounts -t $topic -s $registryschemaOutput:
Run the consumer:
python consumer_oauth.py -b $bootstrap_url --token-url $token_url --client $service_account_client_id --secret $service_account_secret --scopes api.iam.service_accounts -t $topic -g $consumer_group -s $registryschemaOutput:

Conclusion
We have seen how to configure Python clients to use SASL/OAUTHBEARER for producing/consuming messages to a topic using service registry service to perform serialization/deserialization for JSON schema. Hope you find this post helpful. Thank you for reading it.
Opinions expressed by DZone contributors are their own.

Comments